


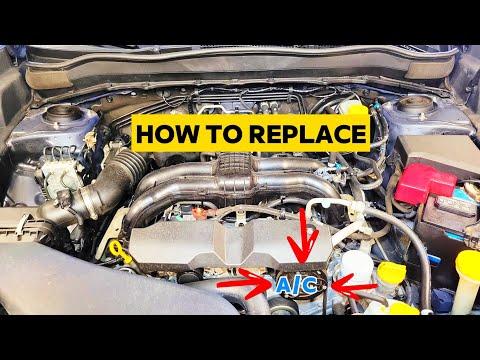
How to Replace the A/C Compressor on a 2010-2014 Subaru Outback 2.5L (Trim: 2.5i | Engine: Flat 4 2.5L)
Step-by-step instructions with tools, parts, torque specs, and refrigerant safety tips for 2010, 2011, 2012, 2013
How to Replace the A/C Compressor on a 2010-2014 Subaru Outback 2.5L (Trim: 2.5i | Engine: Flat 4 2.5L)
Step-by-step instructions with tools, parts, torque specs, and refrigerant safety tips for 2010, 2011, 2012, 2013


🔧 Outback - A/C Compressor Replacement
Replacing the A/C compressor requires recovering the refrigerant, removing both accessory belts, transferring any necessary brackets, and recharging the system by weight. The refrigerant must be recovered with professional equipment; releasing it into the air is unsafe and illegal in many locations.
Difficulty Level: Advanced | Estimated Time: 4-6 hours
Assumption: This procedure applies to the stock U.S.-market 2.5L engine and conventional belt-driven compressor.
⚠️ Safety & Precautions
- ⚠️ Have an A/C shop recover the R-134a refrigerant before loosening any refrigerant connection.
- 🧤 Liquid refrigerant can cause immediate frostbite. Wear gloves and safety glasses.
- 🔋 Disconnect the negative battery cable before unplugging or removing the compressor.
- 🚫 Do not use compressed air to pressure-test or clean an A/C system.
- 🔥 Keep refrigerant and flushing chemicals away from flames and hot surfaces.
- 🧴 PAG oil absorbs moisture quickly. Keep the new compressor and lines capped until installation.
- ⚙️ A seized compressor can spread metal debris through the system. If debris is present, replacing only the compressor will cause another failure.
- 📏 Charge refrigerant by weight using the amount printed on your Outback’s under-hood A/C label.
🔧 Required Tools
You'll need the following tools for this repair:
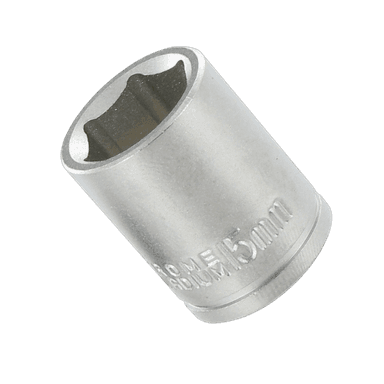
- 10mm socket
- 12mm socket
- 14mm socket
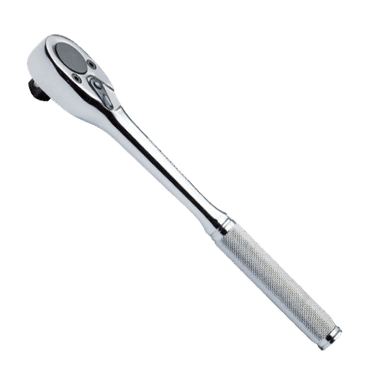
- 3/8-inch drive ratchet
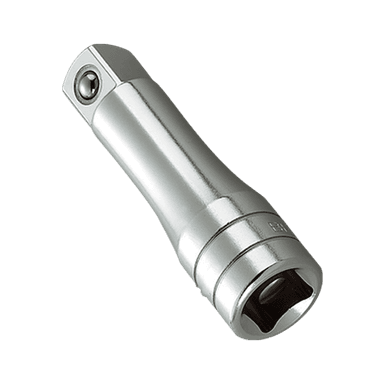
- 3/8-inch drive 6-inch extension
- 10-80 Nm torque wrench
- Combination wrench set, 10-14mm
- Flat-blade screwdriver, 6-inch
- Trim-clip removal tool
- Serpentine-belt tension gauge (specialty)
- R-134a recovery station (specialty)
- R-134a manifold gauge set (specialty)
- Two-stage A/C vacuum pump (specialty)
- Refrigerant charging scale, 5-gram resolution (specialty)
- A/C oil measuring cup, graduated 10ml increments
- A/C line caps and plugs (specialty)
- Drain pan, 2-liter minimum
- Mechanic’s gloves
- Safety glasses
🔩 Required Parts
HowToo sells all the parts you need for this repair:
- A/C compressor with clutch - Qty: 1
- Compressor suction-line O-ring - Qty: 1
- Compressor discharge-line O-ring - Qty: 1
- A/C receiver-drier or condenser desiccant element - Qty: 1
- A/C compressor oil matching the compressor label - Qty: As required
- R-134a refrigerant - Qty: As specified on under-hood label
- Alternator and power-steering drive belt - Qty: 1
- A/C compressor drive belt - Qty: 1
- A/C condenser - Qty: 1 if metallic debris is present
- A/C expansion valve - Qty: 1 if metallic debris is present
📋 Before You Begin
- 🚗 Park your Outback on level ground, select Park or first gear, apply the parking brake, and let the engine cool.
- ♻️ Take the vehicle to an equipped A/C shop and have the refrigerant fully recovered.
- 🏷️ Photograph the under-hood refrigerant label. Its refrigerant weight and oil specification take priority over generic figures.
- 🔍 Determine why the compressor failed. Metallic particles, black oil, or a seized pulley require system-level repairs rather than compressor-only replacement.
- 🔋 After refrigerant recovery, use a 10mm socket to disconnect the negative battery terminal. Wait at least 60 seconds.
- 🛡️ Record radio presets if desired. No battery registration or coding is required.
🔨 Step-by-Step Instructions
Follow these steps in order:
Step 1: Recover the Refrigerant
- Use an R-134a recovery station and manifold gauge set to recover the complete refrigerant charge. A manifold gauge set measures pressure on both sides of the A/C system.
- Confirm both gauges remain at 0 psi before disconnecting any line.
- Do not continue if pressure remains in the system.
Step 2: Disconnect the Battery
- Use a 10mm socket to loosen the negative battery-terminal nut.
- Lift the terminal from the post and position it where it cannot spring back.
Step 3: Record the Belt Routing
- Use your phone to photograph both drive belts and their routing before removal.
- Inspect the belts for cracks, glazing, frayed edges, or oil contamination.
- A clear photo prevents belt-routing mistakes.
Step 4: Remove the Front Accessory Belt
- Use 12mm and 14mm sockets or combination wrenches to loosen the alternator pivot bolt and the adjuster lock bolt.
- Use a 12mm socket to turn the alternator adjusting bolt counterclockwise until the belt becomes loose.
- Slip the alternator and power-steering belt off the pulleys by hand.
- Do not pry the belt off with a screwdriver because pulley damage can result.
Step 5: Remove the A/C Compressor Belt
- Use a 12mm or 14mm socket, as fitted, to loosen the A/C idler-pulley center lock nut.
- Use a 12mm socket to turn the idler adjusting bolt counterclockwise until the A/C belt is loose.
- Remove the A/C belt from the crankshaft and compressor pulleys.
- Spin the idler pulley by hand. Replace it if it feels rough, loose, or noisy.
Step 6: Unplug the Compressor Clutch
- Press the locking tab and unplug the compressor electrical connector by hand.
- Use a trim-clip removal tool if a wiring-harness clip blocks access.
- Inspect the connector for melted plastic, corrosion, or damaged wiring.
Step 7: Disconnect the Refrigerant Lines
- Place a drain pan beneath the compressor to catch small amounts of oil.
- Use a 12mm socket to remove the suction and discharge line retaining bolts.
- Gently lift the line flanges straight away from the compressor. Use a flat-blade screwdriver only to separate a stuck flange without scoring its sealing surface.
- Immediately seal every opening with A/C line caps and plugs.
- Discard the old O-rings. Never reuse them.
Step 8: Remove the Compressor
- Support the compressor with one hand.
- Use a 12mm or 14mm socket with a 6-inch extension to remove the compressor mounting bolts.
- Lift the compressor from the engine compartment without striking the radiator or bending the refrigerant lines.
- Keep the old compressor upright so its remaining oil can be measured.
Step 9: Inspect for Internal Damage
- Drain the old compressor oil into a graduated A/C oil measuring cup while slowly rotating the clutch hub by hand.
- Inspect the oil for metallic glitter, gray sludge, or black contamination.
- If debris is present, replace the condenser or desiccant assembly and expansion valve. Flush only lines and evaporators that the equipment manufacturer identifies as flushable.
- Do not flush a compressor, condenser with non-flushable passages, receiver-drier, or expansion valve.
Step 10: Prepare the New Compressor
- Read the oil type and prefill information supplied with the new compressor.
- Use the graduated A/C oil measuring cup to adjust the oil quantity according to the compressor manufacturer’s instructions and the amount recovered from the old unit.
- Do not automatically add a full system oil charge to a compressor that arrives prefilled.
- Turn the compressor clutch hub by hand at least 10 complete revolutions to distribute the oil.
- Too much oil reduces cooling performance.
Step 11: Install the New Compressor
- Place the compressor squarely onto its mounting bracket.
- Start every mounting bolt by hand to prevent cross-threading.
- Use a torque wrench with the correct socket to tighten the compressor mounting bolts evenly to 25 Nm (18 ft-lbs).
- Do not use an impact wrench on the aluminum mounting points.
Step 12: Reconnect the Refrigerant Lines
- Lightly coat the new O-rings with the specified clean compressor oil.
- Install the O-rings onto the lines without twisting them.
- Seat both line flanges squarely against the compressor.
- Use a torque wrench and 12mm socket to tighten the line retaining bolts to 7.5 Nm (66 in-lbs).
- Reconnect the compressor clutch electrical connector by hand until its lock clicks.
Step 13: Install and Tension the A/C Belt
- Route the new A/C belt around the crankshaft and compressor pulleys using your routing photo.
- Use a 12mm socket to turn the idler adjusting bolt clockwise until proper belt tension is reached.
- Use a serpentine-belt tension gauge and set the new belt to the belt manufacturer’s specification. Do not estimate tension by feel.
- Use the appropriate socket and torque wrench to tighten the A/C idler center lock nut to 34 Nm (25 ft-lbs).
- Rotate the crankshaft two full turns by hand only if the proper crankshaft socket is available, then recheck belt seating.
Step 14: Install and Tension the Front Belt
- Route the alternator and power-steering belt around the pulleys using your routing photo.
- Use a 12mm socket to turn the alternator adjusting bolt clockwise until the belt reaches the manufacturer’s specified tension.
- Verify every belt rib is centered in its pulley groove.
- Use a torque wrench and appropriate sockets to tighten the alternator adjuster lock bolt and pivot bolt to their bracket-specific specifications.
- Do not overtighten the belt; excessive tension damages alternator, power-steering pump, and idler bearings.
Step 15: Reconnect the Battery
- Place the negative battery terminal fully onto the post.
- Use a torque wrench and 10mm socket to tighten the terminal nut to 6 Nm (53 in-lbs).
Step 16: Evacuate the A/C System
- Connect the R-134a manifold gauge set and two-stage vacuum pump to the service ports.
- Evacuate the system for at least 45 minutes, or longer in humid conditions.
- Close both manifold valves and switch off the vacuum pump.
- Verify the system holds vacuum for at least 15 minutes. A loss of vacuum indicates a leak that must be repaired before charging.
Step 17: Recharge by Weight
- Place the refrigerant cylinder on a charging scale with 5-gram resolution.
- Charge only R-134a and use the exact weight printed on your Outback’s under-hood label.
- Use the manifold gauge set and follow the recovery-station or charging-equipment instructions.
- Never rely on can pressure or vent temperature to determine charge quantity.
✅ After Repair
- ✅ Start the engine with the A/C switched off and listen for belt squeal, scraping, or knocking.
- ❄️ Set the blower to medium, temperature to full cold, recirculation on, and then switch on the A/C.
- 👀 Confirm the compressor clutch engages normally and both radiator fans operate when commanded.
- 🔍 Use the manifold gauge set to verify operating pressures are appropriate for the outdoor temperature and humidity.
- 🌡️ Measure center-vent temperature after the system stabilizes.
- 🫧 Check both compressor line connections with an electronic refrigerant leak detector or approved leak-detection solution.
- 🔧 Recheck belt tension after approximately 15 minutes of operation and again after several days.
- 🛑 Stop immediately if the compressor knocks, the belt smokes, or high-side pressure rises abnormally.
💰 DIY vs Shop Cost
Shop Cost: ₹45,000-₹85,000 (parts + labor)
DIY Cost: ₹25,000-₹55,000 (parts only, excluding recovery and recharge equipment)
You Save: ₹15,000-₹30,000 by doing it yourself!
Panipat labor and imported-part prices vary. A shop typically needs approximately 4-6 hours, including evacuation, charging, and testing.
🎯 Ready to get started?
HowToo makes it easy: same-day/2-day shipping on every part, plus all the tools and specialty tools you need! Check out the parts and tools sections below to add everything to your cart.